Thursday 15 December 2016

S.W.O.T

Looking back at previous work, I have made many different things throughout last year. However these two pieces of work I am going to talk about now are probably the pieces of work I am the most proud of.

The first is a board game that I had to design from scratch, we had to design ever aspect of the board game so that it was an appealing game and at the same time looked very eye catching so that people would like to buy the product. I think I managed to achieve this in my work. It was made to be very simple so that almost anyone could pick up the game and get playing. The colours that I used all fit together very nicely and this ended up making the board and the box for the board game very appealing and modern. I think one of my weaknesses for this project was that I spent way too long on the design part while not really giving the rules of the game a whole lot of thought. Also my board and the box for my game both had flaws, the design on the box did no align in some places and the spacing for the board was a bit uneven. I could have created my own font for my game and could have used my logo in more places. Without the unique font it made the box look very stock and uninteresting. The logo could have been used on the box so that it could be easily identifiable for new users.

My other piece of work I am very proud of has to be my short film called, 'Cold Fusion' we were given the subject that we had to base our project on, but had to create everything else ourselves. One of my strengths was that my script was written very well and had a story that made you want to find out more. It also had a very nice plot twist at the end that made the film open to potential sequels. I think my weaknesses were quite apparent in the final piece, when recording my film I had forgot to set the resolution to the standard HD, this meant that the film did not show the full range that it could and the quality did not look as good. The audio was also quite bad at times due to loud vehicles or the wind. I think one of the hardest things at the time was getting use to filming, I had only done it a few times before and was quite rusty. However I thought that i didn't do that bad and I thought that some of the shots I had go for the film weren't half bad. If I were to do it again I would have actually gone to a home to get some shots for my film instead of using the tight space in college.
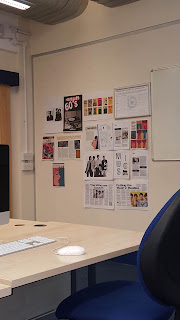
Friday 9 December 2016

Peer Evaluation

I have now created a brief front cover for my book and have created a few double page spreads. Like I have said before using a normal photo done by a professional is something that I should and will include for my final piece. The text that I have done however will need to be changed to something a lot more solid and straightforward.

I have tried to keep to the boxed in sections type of text through out my different pages, I think that it suits well with the type of magazine I am trying to produce showing that it is a important book that is made to provide the reader with the information they are looking for.

I have tried to add a few interactive element to my work, for example a sound button that people can click on and use so that they can for example, listen to something that the audience had said or a short snippet of something that the artist has song. I also included a QR code into my work but when the whole of the class were brought forward to show everyone their work that whole team decided that a QR code would be pointless and not worth it. Instead I should include hyperlinks. I also added animation into my book to give it a bit more life and to make the article grab the users attention. I would also like to include the odd video here and there, I believe that it would make the user stay using the book for longer because they would not feel as so threatened by the large amount of the text used.

Using images around the pictures is a feature I like using a lot and after looking at other members of the group pieces of work I have really gathered a lot of useful information and have even picked up on a few different ways to layout/ format my work that I will try to add to my work while giving it a unique twist.

1960s Vietnam War


Today we were set the test to create our own two page anti war newsheet. We were given a set of photos that we were allowed to include in our piece and were told that we had to stick with 2 colour only throughout both of the pages.


The task was set to test how quickly we can make something with limited time and to improve our skills with Indesign. I think that for the time that we had I made a pretty good anti war newsheet. It was laid out well, had just the right amount of pictures that portrayed what was being talked about in the article very well.

I also felt like I used the 1 colour very effectively to highlight the most important part in the photo, for example I used the yellow to give a bit more light on the napalm gas that was in the photo. Doing this I feel gives the photo a bit more life that it would just keeping it black and white. I also sketched out the shot of a gun to make the photo look a bit more interesting and to show the audience what happened after the photo was shortly taken. I also divided the picture into three parts so that I could still show the whole photo but taking out all of the parts that were not needed. It also made the page look a bit more stylish, like there were three windows across the page. 

Thursday 1 December 2016

Target audience and accessibility

Due to my piece being interactive and having to use a device like a iPhone, tablet and Android phone I think I will have to focus on the age range that knows how this technology works and can use the full experience that I will give to them when making the interactive piece of media. I think the age range from 20-30 is a good age range I will have to make sure that it is suited to them. 

I might want to try and appeal to the 50s age range as well so that people who use to live in the 60s could experience the interactive piece and enjoy it, they will probably get some help from the younger people in there family and friend groups. Including things like little music buttons that the user can click is a great way to make the user feel way more involved in the book. Some people who might be slightly older might not know how these things work but if used with a younger person in the family they can discover the full potential of the book together. I think when it comes to the interactive part I do not want to make it too complicated so that people that are older don't find it too overwhelming to operate. My main focus is going to be the 20-30 age range so the book will be tweaked around them as a priority.

There are not going to be many people aged 50+ checking the amazon book catalog or iBooks store so when it comes to how I would advertise the interactive book I would have to try and make it look appeal to the younger age range so that I can get their attention. I might have to alter a few things in the book but I will try and keep the 60s look that I am trying to get across. This should not be hard to achieve I will just have to be careful on how I present my book before people actually download it.

For people who are a bit younger, 20-30 having the book be interactive will be a massive benefit to them, this is because it allows them to learn a bit more about music magazines back then through the use of hyperlinks, buttons and videos.

Back in the 60s the 'Rave' magazine was meant to appeal to the younger adult to older adult age range so there really shouldn't be anything child related in the book because it would be unnecessary and pointless to include, that is if I am trying to stick with how it was done back then.  

Trial Design on InDesign

From my last blog I talked about the layout of text and how images were used in magazines back in the 60s and how it is different to how it is nowadays. I quickly made a outline on what one of my pages could looks like. It uses a few of the features a 60s magazines used. 

I made the whole page black and white so that it would fit with the theme most magazine pages back then would use. I also put the title to the pages in the middle of the text next to the image instead of at the top when you would usually see the heading of a article. I thought that this looked very interesting and I really like how it isn't at the top of the page. I also put the text around the title and around the main image like they use to do in the 60s magazines, I like this effect, it makes it seem as if the person in the image is within the text and it makes everything look more involved.

I believe that I can still add a lot more in the future and I am only touching the base when it comes to creating my own interactive book. Before creating my book I will look at other interactive books and see the ways in which they use the interactive features to their and the customers benefit.

Wednesday 30 November 2016

Typography and photography

Rave magazines were weird in that some issues would include the a different font for the 'Rave' logo. They would only do this if they were releasing a exclusive edition or if they had someone very special on the font cover. I found this to be quite odd, and in my eyes did not really make a whole lot of sense. I really like how they gave the text a bit of depth and would sometimes put parts of the text behind the main person on the cover. I will be doing this for my own magazine. The cover of most of the magazines did not include a lot of pugs, I do not know why, this ended up making the cover quite bare and boring. It also does not provide the user with a lot of information on what they should expect to find inside. Some of the 'rave' magazines also included a '!' in their logo, I think that it did look better with the '!' however I think they could have just made the text upper case allowing it to be a bit more explosive and eye catching.

Looking at the double page spread below you can see that the text is laid out quite well and makes for an easy read. I feel like the text is left out and that the image is the main focus for the article even tho it may not be their original goal. If I want to create the authentic feel that we are meant to achieve then I will have to make sure that I do this when creating my double page spreads. Colour was also very expensive back then and this is the reason why these images do not include colour. Once again I will have to incorporate this into my work. 'Tremultous' is drawn to look very wavy and bubbly because that was a cool thing to do back then that appealed to people. I like the way how the text flows around the people and how it is used as a title to the main article.

In many magazines there were errors in the way the text was laid out. This sometimes resorted in bits of text looking a bit odd and different to one another. This might have been due to technology and the cost of getting it all printed again being too large. I might want to do this when creating my pages so that I can get a better authentic feel.  

Photographs used in magazines back then were very professional looking. The people in the photos however always looked very different to how you would see people in magazines now a days. Their clothes were very extravagant and eye catching to fit with the style back then. Using product in mens hair back then was very out of the ordinary so most mens hair would be very bushy and untidy. Not all photos were cropped and altered the same way, as you can see in the image below for the big image they cut around the singers and did not use the background when taking the photo. While the other includes a background, this may have been used to add a bit more to the bland black and white that people were probably use to seeing on magazines back then. When creating my pages I will have to do some of this myself. 

Almost every photo looked like it was from a photo shoot people in the photos were not trying to give off a vibe like they were just doing their own natural thing. Quite a lot of images were drawn back then as well to cut back on the amount of money it would cost to print a picture and shoot it. This also meant that drawings could be used to make the page look a little more interesting than just plain text.

Friday 25 November 2016

Research (Moodboard and Sketchbook work)

Today we were given the brief for our new project and were told a little bit more information on what we could do for our projects. I decided to choose music for my project because I find 60s music to be very interesting and I believe that it had a very big impact on the culture back then. When we went to London and looked at the 60s expedition the other day, I felt like I learned quite a lot on how everything was presented back then and I think that I can do something good with this.

So I decided to look at some of the magazines that were music focused back then. One of the most well known music magazines was the magazine 'Rave'. It was quite costly for their times however it included about 60 A4 pages with quite a lot of the pages coloured. This was out of the ordinary back then due to magazine run costly a fair amount of money, especially A4. The front covers to the 'Rave' magazines really do show how high quality they are, the photos all look very professional with almost all covers trying out new techniques in design. I also like how the pictures used are not psychedelic, It looks like the magazine is trying to prove a point and not follow society, once again this shows how high quality this magazine really is.

I think when I create my magazine I will definitely follow the same sort of design that is used in 'Rave' because it works well and  can do a whole lot more that what a psychedelic drawing could ever really do, for example allowing the audience to be able to connect with the singer by using a picture of the singer looking at the camera.

Friday 18 November 2016

Museum Trip

Yesterday we went on a trip to London to visit the Victoria and Albert Museum. We went there to find out more about the 1960's for our upcoming project. The show was quite long and touched on many things from fashion to Martin luther King. It was very interesting learning about all of the culture and how the 1960's had such a big impact on the world. We also got a chance to look at the media that was used around that time, I found all of this very interesting. 

I think one of the most interesting things about the 60s was the festivals. Festivals at the time were a new idea and everyone was not sure on whether people would find interest in them. However they were quite quick to pick up and a lot of festivals around the UK managed to get around 500,000 people, when only expecting to reach around 50,000. I am very interested in how the word got about, and how so many people managed to hear about the event. Clearly posters paid a big part in this and I would like to have a further look into how the posters would have been designed, and how the were appealing for that time frame.

Fashion was also a very big part of the 60s and a lot of the trends back then were quite wacky and wild. Almost everything that people wore back then included something that appealed to the person wearing it, it gave everyone there own type of look. The radicle patterns were also very popular and a lot of them tried to look like the sorts of patterns you would see while getting a hallucination. You can see to the left that the colours on the clothes are very different to what people would wear today. I believe that people back then use to love expressing themselves are were not afraid to make a point. This was not only apparent in their clothes though, the many actions that people did back then were also very wild.

Thursday 10 November 2016

Where are you at now and what are your next steps?

For my last few months at college I just want to gain a good idea on what I want to do when I leave. I want to also have lots of experience in this section as well, so that I am prepared for that sort of job when I leave. I want to have very good skills in the adobe suite because I believe that I may need them when I go into my job of choice. I also want to try and get the best possible grade I can at the end of the year to feel like I have left on a big high. All of the things I learnt last year have influenced what I wanted to do this year, and I do not regret my decision at all, I believe that what I have learnt so far this year will help me in the future no matter the job I go for. I also want to do things that I have not covered in the past as well to see if I enjoy it, therefore giving me more options for the future. Literacy and spelling is also an area that I want to improve on, I want to get better at writing and I want to expand my vocabulary for the future. 

My product

My idea is to create a service that gives people a helping hand with making their own home appliances. It will be web based but will include animations that show the user how to make their appliance of choice. This is because it is quite common that people do not understand the instructions given to them and can spend hours making something that is actually very easy. The website will include a forum where people can discuss problems they have experienced and ways around the problem. They will also be able to vote for what animations will be made and will feel like they are doing a good thing for others. Animation will be short and sweet and will clearly show what to do throughout the construction of their product.

Tuesday 8 November 2016

Business Service Idea

I am going to create a website that is all about helping people with building instructions. When building something for example a bed or a desk from certain retailers. There can be certain parts that people can struggle with achieving due to the still images on what to do. This website would use animations to portray the still images shown in the instruction books, to make it easier to understand.

Common problems that are not explained in the instruction book will be put into smaller animations, for example having to hold up a piece of wood to be able to put a screw in with ease. These will be put on the same page as the product below the full animation. Each product with an animation will include a rating on how hard it is to build the product you have bought. You can also use this rating system however to check before you buy the item to see how much stress it is going to put you through.

Problems that people run into on more than one product will not only be on the specified product page, but will be put onto a page called, ‘Common Obstacles’. Allowing people to quickly access tips without having to navigate for a long time around the website.

There will be a forum on the website that allows people to submit their own strategies that people can upvote / downvote. There will also be a third option, this option is called, ‘R&U’ meaning read and used. People will also be able to comment on animations and forum submissions. If posts on the forum get enough ‘R&U’, animations (50) they will have an animation made for them.

The animations will be simple and easy to understand. It will be paced well aswell, it will be quite slow so that people can pace themselves alongside the animation. The actual artstyle will be clear black and white and animations will only shows colour if needed. 

The website will be quite stylish but will not look complicated. This is so people visiting the site can feel welcome and not feel too overwhelmed by everything, this is a website based on making things simple and easy after all.

Thursday 3 November 2016

Logos

Most of these logos are quite complex and thats what I like about them all. Simple logos to me just seem boring and unattractive. Logos that usually incorporate something into the logo that relates to the name / brand I find quite fascinating. 

For my logo I tried to add a bit more than a bit of text. I decided to add the resize margins that are usually around objects from photoshop, illustrator ect. I did this because I really like designing things and I thought that the margins would make it very clear in what I am interested in and what my logo maybe linked too. I also decided to not make the text symmetrical because I wanted to once again give people a clear indication that I design/make things. However I might change this if I believe that it would look better symmetrical. I choose purple because it is my favorite colour.

Target Audience

My target audience is going to focus mainly on the 20-40 age range. This is because this is the sort of age range that shops at home appliance places and constructs their own appliances. They are also an age range that have good enough skills to use the internet to be able to access the website. Almost anyone can find anything difficult but I believe that this age range, especially the 30-40’s will benefit from this a whole lot more. The gender of my audience will be male but women should definitely not be taken out of the equation because like I said earlier almost anyone can run into problems when it comes to construction. 

I think the main areas of people the website will cater too will definitely be students who are maybe at University or just moving into their new home. People like this usually have very little knowledge about making things and may find it hard reading instruction. Mainly they will be constructing objects that are quite simple to make for example desks but maybe confused about the little things described on the instruction book.. The other area will be parents of families, these people may have a decent amount of knowledge when it comes to construction and reading instructions but will be building quite large objects, for example bunk beds, wardrobes that will challenge even the most experienced home appliance builder. Places like ‘Ikea’ sell items that are quite low budget so I will be appealing to the middle-class/ slightly lower class region.

Looking at a website, https://www.ifixit.com/ that is a website about finding parts for electronic devices and including a board where people can help each other with problems by simply asking questions. This may not be exactly what I am doing but is very similar. I managed to gather a lot of helpful information. I found out that it is key to organise your website so that it is easy to navigate and easy to understand. Some 30-40 year old will benefit a lot from a website that is easy to use. Big buttons and a simple but stylish design works very well for this. A big search bar that works very well is also key due to how important it should be to quickly find have access to the information you need. Images are shown to be big and clear on the website and this is something that I will have to make sure I replicate when producing the animation and the pictures for the products. Clearly stating the product name and the model number (furniture equivalent)/ version (year produced), needs to be used on my website. 

Having a forum/ board is almost essential when making a website like mine because it allows people to talk about their own problems they may be having. A website that only features problems that the maker runs into can almost mean nothing to other people so allowing people to discuss between each other is idea for the website to do what is advertised. 

I have designed this little sketch on how I would like the homepage of my website to look. I really want to capture the simplistic look while at the same time looking as good as possible. The search bar is going to be the thing on the site that people should and hopefully will use the most. It will allow them to navigate around the site quickly and stress free. The homepage will feature almost everything the site has to offer so that people who are not a member will get a chance to look and see what they are missing out on. The forum will also be shown on the homepage so that users can quickly look at the trending topic floating around the community. 

I think the most important thing to get right when creating my website has to be the animations and the forum. What makes the website so unique is that to makes things that people struggle with easier to understand. Animations almost fully achieves the goal I have gone out to set but having the forum alongside the animation allows for it to be complete. 

I asked my dad whether or not had had struggled with constructing his own home appliances in the past. He believed that the instructions given to him were not 100% accurate and would sometimes skip parts of the assembly or not give parts of the assembly the full recognition leaving him very confused and having to go back steps to see what he had done wrong making him very angry at times. He would also finish assembling something and still have many parts left over thinking that he had forgot to screw something or missed out a part feeling like the appliance he had made may not be safe. He also sai that at times it was not clear enough on where the certain instruction was pointing to in the appliance and this would also leave him confused at times, this could also be down to the manufacturer however (Hole in the wrong place / not big enough).

I also asked my auntie and uncles to see how they feel about constructing home appliances. My auntie said she had run into trouble before, she tried to make a desk from Ikea, she said that it looked very simple and she thought that it would not cause her a lot of trouble. However she ended up getting stuck while trying to fit in the drawers, she spent many as she would put it, 'excruciating' hours trying to figure out what the problem was and had realised that the parts she was given were incorrect and were not viable for the construction of the desk. She has not tried to build her own home appliance since and said that she will not be returning any time soon. I will have to include a feature in my website that allows users to find out the parts required for their build so that they don't run into the same problem as my auntie did.

Thursday 13 October 2016

Charcoal Drawings

Today we were given charcoal and were told to draw a self portrait and a drawing of someone else in the class. 

This was the first time I had used charcoal to drawing in a number of years so I was quite rusty, this was also one of the first times I had tried to draw a face in a long time. You can see looking at my drawings that the proportion was all wrong and the size of the mouth, nose ect were wrong. Steve did show us how to get our proportions correct by drawing examples on the board, I found these very useful. 

The smudging that you can do with the charcoal I found very interesting, you can see looking at one of the pages that I experimented with this a number of times. I found this to be a very key part of charcoal drawing and I did use it when drawing the goatee. I also managed to smudge my drawings by accident quite a lot and that is something that annoyed me during the lesson. 

I like the way the charcoal looks on paper and the many ways you can alter it but I found the features to be very to use myself. I think if I had the choice I would stick with a pencil. Even though I did not enjoy using charcoal I did find todays lesson very  interesting and it was a great experience.

Poster and type

With all of the types that I tried out for my poster I thought that the one in the bottom right worked best with the whole 60s theme we were given. It gives of the same mood an other poster would due to its easy to read but wavy look to it. Due to it having to be hand draw you cannot see of my finished poster what the text would look like but it would say on it, 'Beatles'. 

I chose the multi colours because I thought that it once again fit very nicely with the theme and the other poster I looked at in the last blog also used this same colour effect. Having different colours pulsate around each of the characters silhouettes makes it seem like each of the character are pulsating like the are alive and happy! The border around the text is a bright yellow colour, I did this so it wouldn't clash with the colours behind it as much as it would if it were a pinky / red colour!

Tuesday 11 October 2016

Museum Trip Drawing

Last Thursday we went on a trip to the museum to draw. We were allowed to draw whatever we wanted in the museum, this lesson was to just get us into the feel of drawing due to it being a very key part or the course. I found it very fun to be able to have the chance to draw quite detailed things because it is something that I have never really done before. I also use to draw very basic drawings and then stopped long ago. The drawing that you can see above took me quite a long time to draw but I was really proud with the end result!

Paying attention to detail was something Steve pushed forward throughout the session. This is because when drawing for a client it is very important to make sure that ever tiny bit of detail is included in your drawing, so that they can see what you are trying to portray fully!  

Monday 10 October 2016

Logos

At the start of the lesson we were introduced to our task, where we were shown various logos and there effectiveness and how the are memorable. We had to create our own logo for a Folklore Museum and make a logo around the theme of that. 

For some of my logos I expanded from existing ones and for others I just came up with the design myself. I think my favourite logos have to be the one in the centre that includes a tree and the blow horn one on the left. I believe that the middle one fits in with the theme of the museum because it's mean to be an old withered tree and some old stories refer back to woods. For my other logo I tried to include an old item that was used in the past to once again refer back to old stories. I think the way the text is shown in those two logos are probably the easiest to understand and read out of all of them and still allows the logos to be memorable.

Self Portrait


Friday 7 October 2016

Reminder Card


I have decided to keep my card very basic to get the point across to a lot of people. The only colours I have featured in the card are ones for the Bath College logo and the lanyard colour so that colourblind people can relate these two items together. For people who do not speak english very well I have included a series of images that clearly show what the card is trying to get across to the audience. Using the thumb up and thumb down is a universal way of saying I agree I disagree/ yes or not so I used it here. The text has been spaces out so that it is easier for people with dyslexia to read I also left the background white and the font black so that people who use colour to read text so easily use their chosen colour to read this card.

To test to see if this would work I could put these cards all around college and conduct my own survey/ or have a website on the back of the card, so that I could find out whether or not the person using the card understood the message and whether or not they got it straight away or if they really hard to think hard to decipher the message.   

Accessibility throughout the media


When it comes to creating media it is very important to make sure you are aware that not everyone may be able to access it due to a disability they may have. So trying and make it accessible to as many different people as possible is always a good way to go around things. This can include people with Dyslexia, Colour Blindness and  people with no understanding of the language used. If you are creating something that is important and is audience facing the singling out any of these can be a breach to the, “Disability Law UK’ ‘Equality Act 2010’ this can have serious consequences. 

Making media that does not appeal to people with colour blindness this means that those people will find it incredibly hard to read or see what you have created. 

Dyslexia is also a disability that you have to be aware of when creating certain types of media. Type is something that can increase the difficulty of reading by a large amount for a Dyslexic person if the wrong type or format is used.

When it comes to a language barrier, you may find it very hard to produce something that the person can understand because you have to do a bit more than the others. Pictures help very much for these types of people, also symbols can be used if the person knows how to read them. When creating some type of media you may have to make something completely new based solely on someone with a language barrier.

Thursday 6 October 2016

Podcasts

OTHERtone - Kid Cudi

In this Podcast they talk about a range of different topics, some being ones that relate to the the artist others being things that the audience members might want to know the answer too. In the preview below however only a part of the Podcast is shown. The Podcast is meant to be quite laid back, and is a place where people can talk about what is on their mind. 

From time to time the presenters and the guest may have a small debate between each other so you not only find out about how the guest feels but also get to know what is on the presenters mind too. Having more than two people on the Podcast allows there to be a wider range of questions asked that might not have been asked if there were only two people.

They also let the guest talk and do not interrupt them so that they don't feel rushed. 

Friday 23 September 2016

Type and Layout Part 2

Psychedelia is an art style that is influenced by the use of drugs it tries to portray what it looks like while using the selected drugs. Psychedelia is a very colourful wavy sort of art style, it uses very bright but cool colours with a few hot colours to mix, I think this is used to try and make the audience feel calm and safe. Patterns are used quite a lot to try and hypnotise the audience making them feel lost in the colours. Wildlife and humans seem to be some of the only things used in the art style, once again this must be because of how down to earth the art style is.


The type used in most of the images is curvy and does not feature many sharp edges, The colour of the type is also a colour that stands out so it is clear and easy to read and text is usually very thick, making it stick out. However sometime the type is incorporated within an image for example a human or a flower.

For my poster I am going to add my own type of text, it will still stick with the curvy theme. But I will not go for the generic type that is used across all of the posters I have looked at. I have created my own and I feel like it will fit nicely if it were to be put next to another poster that is Psychedelia themed.

Thursday 22 September 2016

Type and Layout

Marshall McLuhan was a professor, philosopher, and public intellectual. However he was mostly known for how he influenced media through all of his studies. One of McLuhan's most famous quotes was, 'The medium is the message' this basically meant that McLuhan should not just look at the media but look at how it changes the life around you. McLuhan influence media with the, 'Media Theory'. He created many books that all use different types and layouts that fit with the overall theme of the book. 


West Side Story is a very popular for being the most acclaimed musicals of all time. On top of the musical cam a very memorable poster that became very well known. The poster features a range of colours that all fit together very nicely the white on top of the red allows the white to stand out more and catch the audiences eye first. The type also includes itself with the image where it stacks on top of each word to make it seem as if it were the building. Some of the letters in the title also have also been stretched to once again involve itself with the image. I think that this is a very smart way of including type in the poster, it not only tells the audience what film the poster is based on but allows the poster to in a way become the logo and the most memorable feature of the Musical. 


Another poster, this time it is about, 'The Good The Bad and The Ugly'. In this poster the type used isn't the typical western font they have decided to add their own twist on the typical font. I think this a very cool way of doing things because it makes the text their and it is a bit more fresh. The layout is quite peculiar, including a panorama type image in the very centre of the poster with three full body shots overlapping and cover up the rest of the page. Clint Eastwood is a very iconic character that can usually be identified by the clothes he wears so having his basically centre with a full body shot makes it very easy for the audience to understand what kind of western film this is.

Friday 16 September 2016

Mary Shelley and the birth of Frankenstein Research Task

Mary Shelley is the author of the book, 'Frankenstein' which was produced on the 16th of June 1816. Over the summer Mary Shelley, Percy Shelly and Mary Wollstonecraft Godwin travelled to Switzerland in order to meet Lord Byron and Claire Clairmont who was Shrelley's step sister and Byron's mistress. Keats Shelley House (2010) Piazza di Spagna 26, 00187 Rome. Available at: http://www.keats-shelley-house.org/en/romanticism/timeline-1816 (Accessed: 16 September 2016)

After Fanny's suicide due to neglect, Percy Shelley proceeded to right many poems that were all about her. However the family and friends tried to keep Fanny's death hidden so no one would find out. Telegraph (2007) Available at: http://www.telegraph.co.uk/culture/books/3666308/Too-shy-to-gossip-too-plain-to-join-in.html (Accessed: 16 September 2016) Shelley’s Guitar, no. 60; The Clairmont Correspondence, i, pp. 86-9. 

Shelley's bath adress is 5 Abbey Church Yard, Bath, her house no longer exists however the Bath Abbey takes it's place. History Makers of Bath (2014) Available at: http://historymakersofbath.co.uk/mary-shelley-1797-1851/ (Accessed: 16 September 2016) 

Quote from Shelley: "I placed my head on my pillow, I did not sleep, nor could I be said to think. My imagination unbidden, possessed and guided me.. I saw with shut eyes, but acute mental vision, - the pale student of unhallowed arts standing before the thing he had put together, I saw the hideous phantasm of a man stretched out, and then, on the working of some powerful engine, show signs of life and stir with an uneasy, half vital motion... frightful must it be; for supremely frightful would be the effect of any human endeavour to mock the stupendous mechanism of the Creator of the world. His success would terrify the artist; he would rush away from his odious handiwork, horror stricken.... He (the artist) sleeps but he is awakened; he opens his eyes; behold, the horrid thing stands at his bedside, opening his curtains and looking on him with yellow, watery, but speculative eyes.". Here she describes how she came up with the idea for the story and a basic overview of the origin story. Frankenstein Films (2007) Available at: http://members.aon.at/frankenstein/frankenstein-novel.htm (Accessed: 16 September 2016) 


Monday 23 May 2016

Peer Assessment

Rory made a modern day short drama film. One of the things he like the most about the whole project was editing the film because he found it reassuring to see it all come together and he enjoyed getting all the shots for the 'nightmare scene'. Being a director is also something that he enjoyed a lot because he liked having control and liked bossing everyone around. Working with the actors also made Rory's shooting a lot more enjoyable and he felt like work got done and they still had times to have a joke around.

Rory would have gave himself a bit more time in the pre production so that he could make more shot decisions, making the film better as a whole. Scheduling was also a part that Rory would do better if he had another chance to, this is because someone hod dropped out on him last minute making the whole shooting process a bit more stressful on his part. 

Rory believes that he has still not discovered the full potential of filming and wants to get better with it in the future, this includes using a camera, he wants to be able to make better quality shots and a wider range of different angles. He also wants to get better with audio, this is and area he believes he has never really been good and wants to get better that it so that his projects are better quality.

Friday 20 May 2016

Evaluation

Did I accomplish what I had originally set out to do?

Looking back over my finished project I can now see that I have achieved most of the targets I set myself before I set out to make the website. It was very important that I reached these goals because if I did not, then some of my target audience might not like my website and may want to go somewhere else.

One of my targets was to create a simple and easy to use website - I believe that my website is very simple and easy to use. It is very clear to the audience what they are going to click on and with the use of pictures, people can easily relate that picture to the information they require.  In addition, if they were to find that image on another part of the site, they would instantly know what subject that touches upon. The desktop and phone versions of the site both feature links that show the audience their last one or two pages viewed - this means that the audience can just refer back to the links if they want to find out where they are on the site. The desktop version also allows the audience to click on the links and go back to the previous pages, while the phone version has a simple and easy to use hamburger menu that they can use to operate the site with only a few touches. 

Another goal I set myself was to create a brand to go along with my website. This was one of the first things I did when starting to create everything and this is because I believe that it is easier to make a website when you have the colour scheme and type face already laid out for yourself. If you are going for a bright and colourful colour scheme like I did, then you want to layout your website in a way that reflects this. I think that I managed to accomplish this.  With the site being very text heavy due to it being more of an information site, I wanted to try and make things a little more exciting for the audience so I created a more colourful colour scheme and used a more exciting font for the logo, titles and subtitles.

Giving the audience a mixture of detailed and simplified information was another goal I set out to achieve however I don't really think I managed to meet this goal as some pages were full with tons of information and others did not have a lot of information at all. This means that some parts of the audience may find the information appealing while others might not. This is quite a big problem because people may only want to go to the site for one bit of information and if they find it too detailed for example, they may move to a different site. I also mentioned that I wanted to give the audience tips on living with the diabetes and give them some first hand and professional advice - I think that I managed to do this when making my site. I included a page where it was all about someones first hand experience with the disease and almost every page had some information from the professionals.

What did I struggle with?

I think one of the hardest things throughout the whole project was coming up with the brand for my whole site. Making a logo is something that needs a lot of thought because it is something that the audience is going to see 99% of the time when on the site. I needed to make it look attractive and memorable. However, I feel like I did achieve this and many people in my group did say that the logo looked very good and fit with everything else on the page. Finding a font that was clear to read but gave a bit more life to the page was also something that took a long time to find.  The font needed to be perfect because if it was not then people could find the text hard to read, especially if there waa lot of it on one page. I think I managed to find a good font that's a bit more lively than the regular 'Arial' font and almost as clear to read. 

Recording and taking the photos was also a part that I found extremely challenging because I have never really been that good with a camera and I think that reflects when looking at some of my images on the site and the certain angles in the video. This was one of the first times I had used a camera so I had to get used to it and make sure that I understood what I was doing with it. I did get the hang of it after a while and I was quite pleased with how the video came out. I just believe that if I had a little more time to use it, I could have made something even better!

Coding was also something that I found quite challenging. I did give it a go, however I couldn't get my head around it. It was a real shame because it was something that I wanted to learn but I just felt like I didn't have enough time. I think if I had more time to learn everything I needed to know then I could have produced something even better than I have done.

What did I enjoy?

What I enjoyed the most had to be the making of the actual site. Like I have said many times throughout this project, having the freedom to create a website with almost no limitations is something that I enjoy doing a lot. I got a chance to improve my skills with the Photoshop software and look at other website makers to see if they were up to par. I also enjoyed creating the brand for my site because I felt like I was actually making my own product. Learning a bit more about audiences and what they like and dislike was something that I found very interesting and I liked seeing the feedback they gave me because I knew that this would alter how I was going to make my website. I also enjoyed the challenge of the whole project it was something that I have never really done before, having so much independence was something that I was never quite confident with before but after doing all of this I can now say that I can be a more independent person.

What would I do differently?

I think one of the biggest things I would do differently is to create a website but using code to make it instead of Invision. Having used the software twice now I really want to branch off into a different way of web design, something a bit more different and challenging would be exciting and I would learn more skills. It would also allow me to do more like, embed a video or link to a different site through the touch of a button.

I would also make a website that I less focused on write and information. I found this to be quite boring at times and I really wanted to do something that involved a bit more skill. I would also include a lot more pictures to go along with the information if I had to make another information focused site, I felt like the images that I used were replicated a lot and some of them were a bit dull. If I had taken more photos for almost every single page and added a better light to all of them I could have made an even better website.

Am I happy with the final product?

I am very happy with my final product I enjoyed making it and I like how everything looks around the site. I like how easy it is to navigate on the phone and desktop versions and I love the colour scheme. If I had a chance to do it again I would definitely do it because I learnt a lot while doing this project and I'm sure I would learn a lot more if I were to do things a little bit differently. I think that I chose the right choice when it came to how we were going to make our product, I have never really been fond of cameras and I am not a fan of animations. I think what I had chosen was a perfect combination of; Moving Image, Publishing and Theory.

Tuesday 17 May 2016

Reflective Blog

Desktop Creation

Over the past week I have been creating my own brand for my website. You can see what I have been doing for that hereI also started working on the look and content that would go onto my site, for the first few days I had my mind set on making a website using 'WordPress' however after looking at their many templates, I quickly decided to make my own website using Photoshop and Invision. This allowed me to be more creative and have almost no limitations when it came to the actual look of the site. 

I have not taken my photos yet for my site but I have plans to shoot them as soon as possible. I think that the colour scheme for the site works well and all of the colours are not too overpowering over the other. The site works well and the content for each section of the site is very short but descriptive just like I wanted to achieve when I was doing my research. I am still adding more pages to the site and should hopefully be done with the desktop version in the next few days. I looked into the website diabetes.org.uk to see if I could redirect people to that sight when the click on the 'Donate' button, however when looking at the sites term and conditions I found out that they would prefer if you did not link to their donate system. This means that I will have to find an alternate way for people to send money to diabetes research. 

Phone Creation

This week I have been creating the phone version of my website, this has proved to be quite a challenge, due to it being very hard to find the correct leading and tracking so that it is clear to read for people using a phone. This is very important and I spent quite a while on perfecting this. If your phone version of your site does not work well or is hard to use then people tend to more else where. With more people using there phones more than ever, the phone version of my site needs to have the same if not more attention the desktop version did. 

I am still adding bits and pieces to my desktop and phone versions and have created a well working hamburger menu. This should allow people to go to whatever part of the website they like with a few simple touches. I am still yet to take the photos for my website, however working on both of the versions has given me a good idea on how I want my pictures to look and fit with the site. I will be taking these photos in the next day or two. I have also come to the decision that I will be defiantly using Invision it is a platform that I know how to use effectively and quickly, in case I have to make any sudden changes a few days before the deadline. The only problem with using the site is that it is missing a few things that are very vital to my site, one of the being that I cannot integrate my own video on 'How to use a insulin pump' that I will be shooting tomorrow on the site and I cannot send people to other websites by them clicking on my 'Donate' button for example. I phone version is still not completely finish due to it being a very hard process, I might have to move some things about to make it more user friendly. 

Finishing Touches

I am now at the time where I am adding the finishing touches to my website, I have decided to put it on Invision to see how everything works are operates. 

Everything seems to be working fine, it flows very well and everything looks in order. Now I have to make sure that it all makes sense and that there are not spelling errors on the pages. I am very proud of how it looks and hopefully I will be done with the making of the site in the next day or two. I have added the photos and have shot the video I have to say I am pretty proud of them as well, my photography skills haven't always been the best but here on the site I feel like I have shown how much I have improved.

Monday 25 April 2016

My Website Branding Guidlines

When creating a website and a organisation in general, you have to make your own guidelines this allows you to make something unique that no one else can use unless they're given the rights. 

When using the logo it must be in the font, 'Pacifico' and the kerning must be set on 'optical' the fill colour being, 'R 250, G 182, B 58' the size of the font should be 60 pt this is unique to the brand and must be followed.

The colour scheme for the website will be R 250, G 182, B 58; R 84, G 187, B 171; R 232, G 68, B 50 colours that are used for anything that isn't type and photos must stick to this guideline because this is how the user is going to easily understand what website they are browsing and to easy recognise the brand itself.

Subtitles and Titles throughout the website have to be in the font type 'Patua One' the text always has to be slightly larger than the base text so it is clear to the user what is the isn't the base text. The base text has to always be in the font type 'Cabin' this is because it fits with Patua One and is clear to understand, it also can't be any smaller than 10 pt. Text should not touch anything else on the page, like the edges of the page or pictures, this make everything look more ordered and more professional.

Photos on the website must not breach any copyright laws meaning that if there is a photo on the website we have either reached out to the owner to gain access or we have taken the photo/s ourselves.

The colours for my colour scheme were discovered by working with 'Adobe Kuler' I looked at some of the some of the many colour harmonies to see what sort of colours would fit well with my website. Triad stuck out to me as something that was quite vibrant and would fit well with my websites concept. As you can probably see these colours I have picked out are not 100% triad, this is because I didn't want to use colours that were too unoriginal.